If you’re looking for a quick and easy guide on how to improve Squat Form, then read on and you’ll be amazed what you can accomplish. We’re here to give you a step-by-step guide to improving your form to help you reap the benefits of this fantastic exercise.

Even veterans of the weight room can occasionally need some help on their form, and despite the simplicity of the King of Exercises, there’s a whole lot of room for improvement. The perfect form will help you get the most out of the exercise, lift more weight, and keep you free from injury so a little bit of focus there is one of the most helpful things you can do for yourself in the weight room.
Contents
What You’ll Need
You don’t need much to get to work on your form, but you do want the essentials of course.
- The barbell
- Weight plates
- Squat rack or Power Rack
- A video camera
- A spotter
The camera is actually pretty essential here, but even a cheap cell phone camera will work. You’ll also want a couple of extra ten pound plates for reasons that’ll become clear in a little while.
Make sure you have collars for your barbell, experimenting with form can get a bit dicey and dumping all of the weight off of one side of the bar can result in some extremely bad results when you’re working with squats due to their tendency to use a lot of weight.
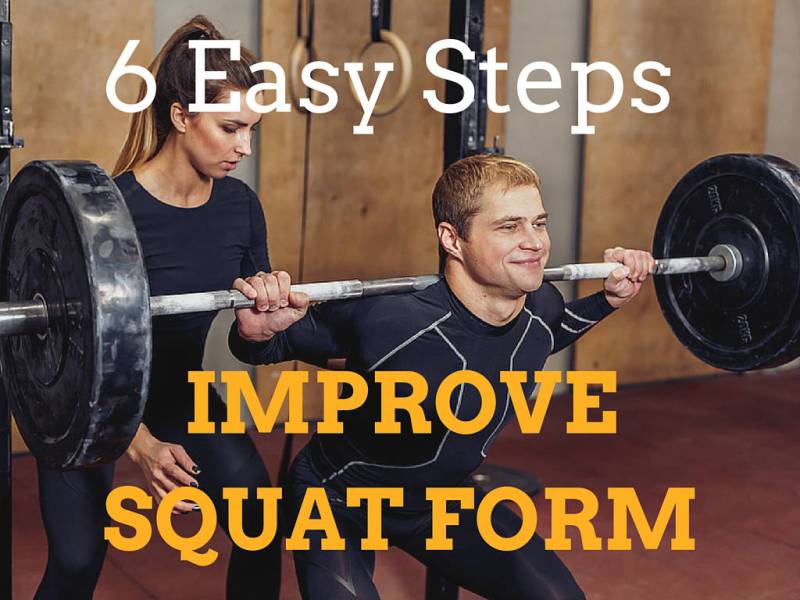
1.) Video Tape Yourself

Source: Shutterstock.com
The first step here is going to be to video tape yourself squatting. Start with your normal weight for about five repetitions and do your reps. Before you review the video, drop the weight significantly but stay under load. Most people who’ve been at it for a little while should be able to do eight to ten repetitions of 135lbs with ease, but if you’re new to it you might want to drop down to about 95lbs or so.
When you’re reviewing the tapes, watch to see how you perform during the last couple of repetitions under the heavier load. If your form noticeably degrades just for the last couple of reps, you’re looking at something that needs to be strengthened to catch up with the rest of your body. For instance, if your lower back is rounding forwards you’ll need to work on your core and possibly your upper back and rear deltoids.
Problems that occur under the lighter load are likely to be ingrained bad habits, and these are the ones that you really need to watch for. You’ll be correcting these issues in the next step, but take careful note of what’s happening.
It seems ridiculous, but your body awareness and what is actually happening might not always mesh perfectly. Having a visual so you can’t lie to yourself is the best way to start on your journey to perfect form.
[thrive_text_block color=”green” headline=””]Protip: Get your spotter to film you both from behind and the sides, this will allow for a complete view of the possible issues. [/thrive_text_block]2) Go Deep or Go Home

Source: Philly.com
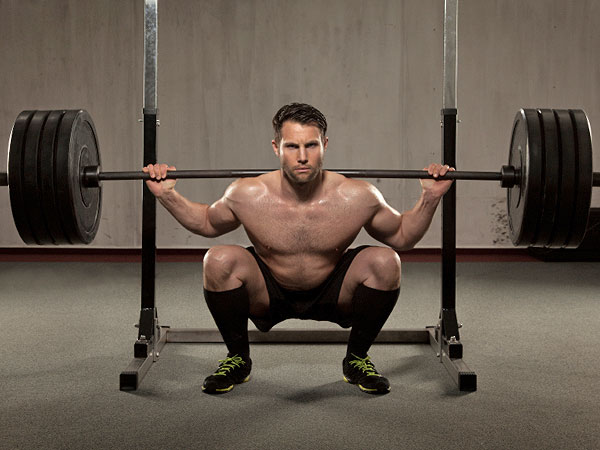
A lot of people have problems going deep enough on their squats. While not everyone recommends the hamstrings to calves method, you definitely want to be under parallel no matter what your end goal is. This might mean dropping the weight a bit, but really the only person you’re fooling if you’re doing quarter squats is yourself.
You want your feet flat the whole time, coming up on your toes as you come down indicates a lack of either hamstring or ankle flexibility and can be quite dangerous for your knees. It’s especially dangerous if your knees pass a significant distance in front of your toes.
You’ll want to work on getting your hamstrings, hips, and ankles flexible enough to do this, and there’re a couple ways to go about it. For your ankles, stretch them manually with your hands, pushing them into a pronated and supinated position and do rotations. Be careful not to overextend anything or you’ll just end up hurt. A gentle stretch once or twice a day is enough.
For the hips, the kneeling hip flexor stretch is ideal. All you need to do is lay down one knee, stretch your other foot in front of you until you feel a mild stretch and then slowly shift your weight forward. You’ll be able to get better distances with time.
Tight hamstrings suck to stretch, but it can be done easily enough. Sit on the floor, bend one leg, and reach for your toes. Be gentle but get a stretch, your hamstrings are important and a pulled one is a serious injury.
[thrive_text_block color=”green” headline=””]Protip: You don’t need to quit squatting in the meantime, simply place a couple of ten-pound plates under your heels and you’ll be able to go deeper. Try to get the natural flexibility, though, it’ll pay off in the end. [/thrive_text_block]3) Keep Your Back Straight

Source: Bodybuilding.com
A rounded back during a squat is a dangerous affair. You can severely hurt yourself if something slips, and it will also cause accumulative damage you may not notice immediately. If this is a problem you see in your video, there’re a couple of different reasons.
If it only happens under load, you’re experiencing a weakness in your core or upper back muscles. Your upper back needs to be tight the whole time, this is most easily achieved by pulling the bar directly into its placement and keeping your elbows perpendicular to the barbell. Tape yourself again, and note how your muscles feel immediately afterwards. If your back isn’t particularly sore, then it’s definitely your core.
Your abdominals and lower back muscles are responsible for keeping your body upright during this essential part of the lift. Tighten them up, tape again, and see if it’s still happening. If it is, you’ll need to find a supplemental exercise which can strengthen the stabilizing muscles that are failing you. Ab wheels are one of the best here, the exercise requires stability in motion. If you’re unable to find one, plank type exercises are also good but they focus more on static stability.
4) Hinge Your Hips

Source: Bodybuilding.com
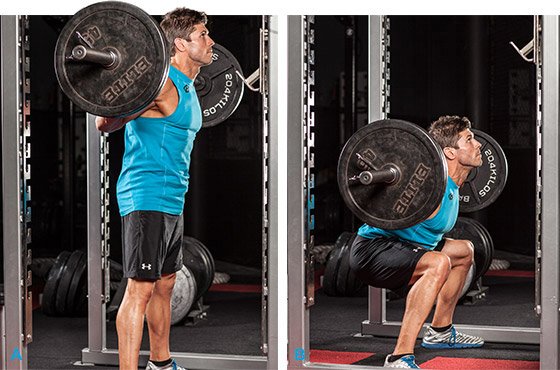
If you find yourself frequently doing the end of a good morning at the top of your squat, you’re in a bad position. Luckily, this one is pretty easy to fix although it’ll take a while for it to become normal muscle memory if you’re not completely new to weightlifting.
When you come down, you need to “sit back” allowing your knees and hips to hinge properly. Try doing the motion without weight a few times, then progress to doing it while just holding the barbell on your back until you get it right.
Coming up, you need to focus on pushing through the ground. This will cause your knees and hips to work together properly as a “hinge” rather than just straightening the knees and then pulling yourself back up with your lower back.
This issue isn’t as common as some of the others, but it can be hard to get rid of. As with the rest of these, a lot of practice is the only way to really get rid of it.
5) Don’t Let Your Knees Buckle

Source: Leanmuscleproject.com
A lot of people have this problem, especially when they first begin squatting. If you’re very new, with only a couple months of experience, just focus on keeping your knees forced outwards as you go. Your hip abductors and adductors are bound to be a bit weak if you’ve just started weightlifting and they’ll strengthen quickly. Don’t push yourself too hard until this issue is under control, though.
If you’ve been at it awhile and notice it happening under heavy loads you may want to take further measures than just trying harder. There’s a lot of different options available to you, and what you do will depend on your own training style and capabilities. You should learn the butterfly stretch at the very least as this will loosen up those parts of your hips and might sort the issue out by itself.
Unilateral exercises are a great way to go about strengthening these muscles, Bulgarian squats are particularly recommended. To perform these, you’ll place your rear foot on a bench while holding two dumbbells of an appropriate weight and lower and raise yourself. You’ll want to use higher repetitions and lighter weight to ensure you are actually working out these vital supporting muscles.
You probably also want to lower your weight for a while. It doesn’t always result in injury immediately, but it puts wear and tear on your knees and a failed repetition can cause some rather serious hurt. It’s best to get the proper form, as an injury of this nature will mean you won’t be able to squat at all for quite some time.
6) Tie it All Together
Once you’ve sorted out all of these issues, you’re free to focus on maintaining the best form possible. These small weaknesses and slight deviations in technique can lead to rather drastic consequences, and they’ll limit the amount of weight you’re able to move successfully. Squatting is all about a lot of details and a lot of mental toughness.
It’s probably still a good idea, even if you have a perfect squat at this point, to keep videotaping yourself on occasion to make sure you don’t go back to your previous bad habits. As long as you perform the maintenance, you’re sure to be pushing impressive weights in no time.
Summary
We hope that we’ve helped you to improve your squat form. This vital exercise should be part of nearly everyone’s weight routine, and its title as the “King of Exercises” is well deserved. Its reputation for being dangerous is mostly the result of people improperly performing it, and if you keep the above in mind you can avoid the injuries and reap the benefits.
Did you like this guide? Have more tips? Leave us a comment.
Leave a Reply
You must be logged in to post a comment.